Compatible Mac/PC devices
- macOS 11.5 (BigSur) or newer
- Windows 11
- USB 2.0 connectivity
- Display Size: 1280 x 800 or larger
Intel Macs are no longer tested but are expected to work.
Operation and compatibility for all devices not guaranteed.
Supported sound modules
 EFNOTE PRO series
Firmware version: 2.0 or newer
To see the firmware version, go to Menu > Settings > Info > Version.
Quick Start
- Make sure your computer and sound module are connected with a USB cable.
No driver software is required to use this app.
- Open the EFNOTE Desktop Tools app.
- Your sound module should be shown on the app.
Click it to open the menu screen and begin using the app.
When your computer enters sleep mode, USB connections may be disconnected and might not automatically reconnect upon waking. Mac users may also need to physically reconnect the USB cable. To avoid interruption, we recommend preventing your computer from sleeping while using the app.
MENU
INST EXPANSION |
Navigates you to the INST EXPANSION screen. |
|---|---|
USER TONE |
Navigates you to the USER TONE screen. |
SUPPORT |
Opens the official product support web page of the connected sound module, which contains manuals, FAQs, and the latest product information. |
Safe Transfer Mode |
Enabling safe transfer mode will reduce the occurrence of communication errors. Some Intel Macs require this to be enabled. |
INST EXPANSION
IXs (Inst Expansions) are add-on instrument packages provided by EFNOTE.
Choose from our variety of IXs available online, install them to your sound module, and play!
|
IX Slots |
IXs can be used for drum pads (Kick/Snare/Toms) only. |
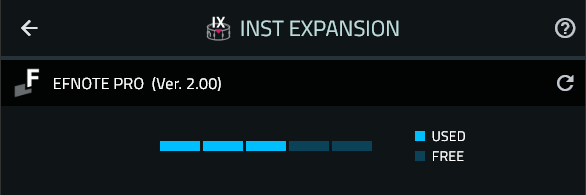
IX Slot Usage |
Indicates how many slots are in use and how many are available. |
|---|---|
 Refresh |
Updates the information shown. |
 Help |
Opens this help page on your browser. |
Back |
Returns to the MENU page. |
SOUND MODULE Tab
In this tab, you can see the IXs already installed on your sound module.
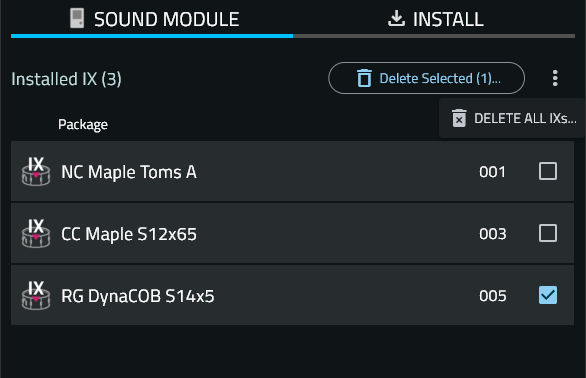
 Delete Selected IX(s) |
|
|---|---|
 Delete All IXs |
This will delete all IXs on your sound module.
|
 .
.
 menu, and click the
 INSTALL Tab
IXs available on our online IX server are listed in this tab.
You can install IXs you want to your sound module directly from the IX server.
To get IXs from the IX server, an internet connection is required.
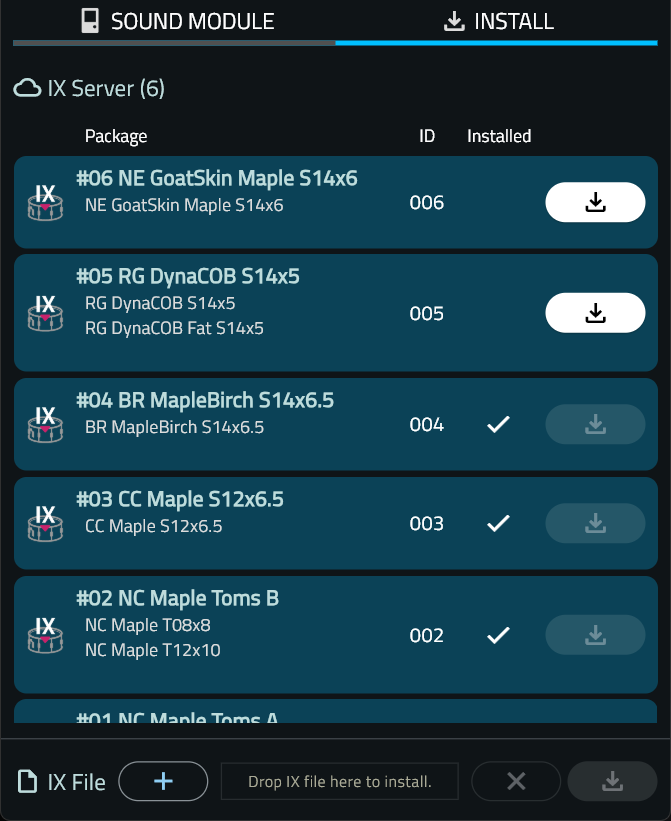
 Install |
After installation, restarting the sound module is not required. If you frequently encounter failures, enabling Safe Transfer Mode may improve the situation. |
|---|---|
 IX File |
Even when you are not connected to the internet, you can install IXs by using IX files that were previously downloaded and installed.
|
 button.
USER TONE
UTs (User Tones) are custom drum tones that can be created with your favorite audio files and added to your sound module.
To create a dynamics-sensitive tone, assign multiple audio files.
UTs can also be used as overlay tones.
You can edit UTs with Tuning or Muffling, just like preset tones.
|
UT Storage |
UTs can be used for drum pads (Kick/Snare/Toms) only.
|
|
Supported Audio Files |
Some WAV files may not load. You might be able to load them by re-saving them with a different application. |
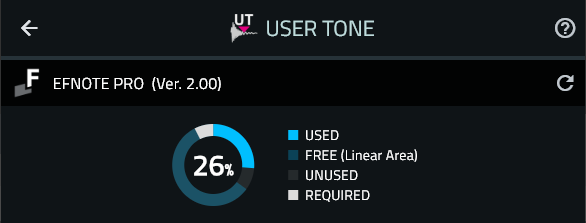
UT Storage Usage |
Indicates the memory your UTs currently occupy, the amount of free space, and the estimated size to be used with the new UT you are creating.
|
|---|---|
Refresh |
Updates the information shown. |
Help |
Opens this help page on your browser. |
Back |
Returns to the MENU page. |
SOUND MODULE Tab
In this tab, you can see all of the UTs on your sound module.
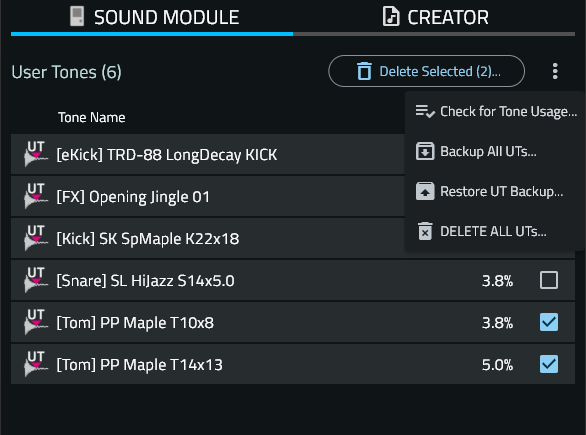
Delete Selected UT(s) |
You can select up to 50 items at a time. |
|---|---|
 Check for Tone Usage |
Check if each UT is being used by any drum kits. Used UTs have a
|
 Backup All UTs |
Packages all UTs on your sound module in one file as a backup.
Do not change its file extension. |
 Restore UT Backup |
Restores all UTs contained in the backup file to your sound module. This process will delete all UTs on your sound module.
If you frequently encounter failures, enabling Safe Transfer Mode may improve the situation. |
Delete All UTs |
Delete all UTs on your sound module.
|
 symbol.
CREATOR Tab
In this tab, you can create your favorite drum sounds with your audio files.
Dynamics-sensitive tones can be created by assigning multiple audio files and specifying layer switching points.
The UT can be assigned to a drum pad just like a preset sound (tone), and you can play and edit them in the same way.
The UTs can be assigned to drum pads (Kick, Snare, Toms), but cannot be assigned to cymbal pads.
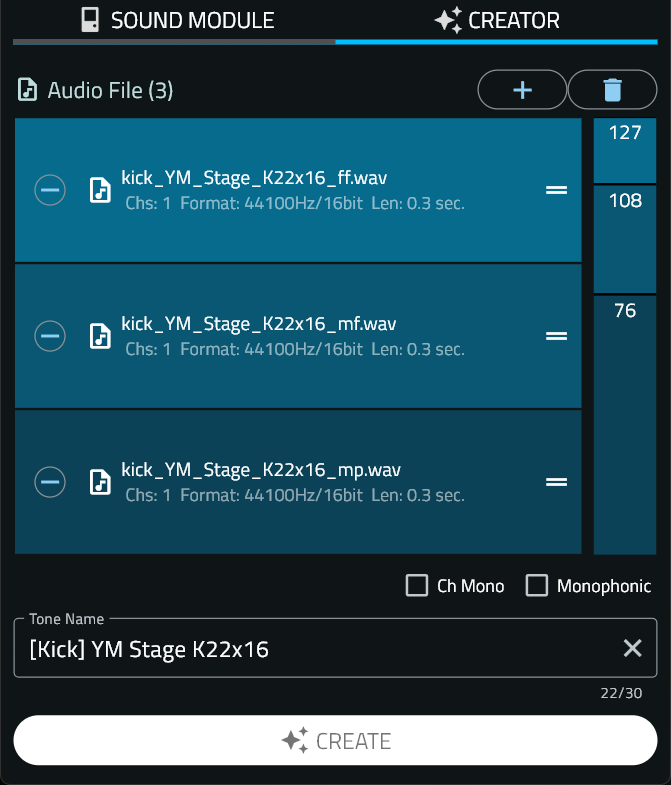
 Audio File(s) |
|
|---|---|
 Remove Audio Files |
Removes all audio files added to the Audio File box. |
Options |
Ch Mono
When enabled, all audio files assigned will be handled as mono channel audio files. Monophonic
When enabled, the UT will be a monophonic tone, and only one tone can be reproduced at a time. The Muffling parameter does not work for the UTs with Monophonic enabled. |
Tone Name |
Specify the Tone Name for your UT. This name has to be unique in the sound module. |
 CREATE |
To create your UT with the specified configuration, click this button. If you frequently encounter failures, enabling Safe Transfer Mode may improve the situation. |
 button.
 handle on each layer, so that the loudest sound is on top and the softest sound is on the bottom.
UT Area Optimizing
After repeated creation and deletion of UTs, the UNUSED area may become larger than the FREE area. In this situation, you might be unable to create new UTs, even if there is still enough available space.
To optimize the UT area and convert the UNUSED area back into FREE area, follow these steps:
| Optimize UT Area |
This process may take some time to complete. No UTs will be deleted during this process. Do not perform other operations, such as changing drum kits, between steps 1 and 2.
When the UNUSED area grows, |
 icon will appear to notify you that optimization is recommend.
Assigning a UT to a pad
|
Assign to a zone |
The Tuning parameter applies to a UT even while it is playing, but the Muffling and EQ parameters only take effect from the next time the UT is reproduced. |
|
Assign as an Overlay Tone |
|